P&ID Components Classification
AseptSoft Core integrates with Autodesk AutoCAD by reading data on PID Shape Components, created by users for classification at the First time setup. This data helps design the Process and Algorithm in the runtime engine.
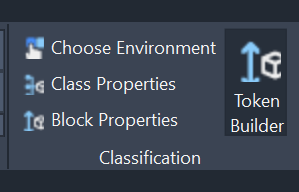
The ways AseptSoft recognizes the types of PID Shape Components is related to an artificial system it provides regarding Properties of these shapes and their classes, which can be created, edited and deleted using the Classification group in the Home Ribbon in AutoCAD.
A PID in AutoCAD is mainly built using Block References and Basic Shapes (like Polylines, MTexts, etc).
The problem in AutoCAD is that unlike Plant3D it does not contain rich information about the blocks (assets in Plant3D).
Because of this we created an entire system which recognized the types of blocks, their Tags, Sizes, etc. using Geometrical Analysis, advanced algorithms and artificial intelligence. It can reliably find the Tags and other properties of Block definitions in the PID, and use this to generate the right Information AseptSoft needs to perform.
Tags and other properties automatic Recognition
AseptSoft will look among the Block References for Engineering Items, Instruments, Sources and Off-Page Connectors.
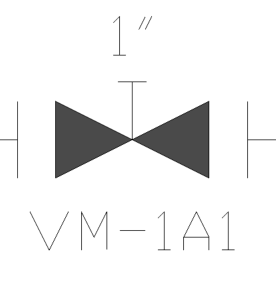
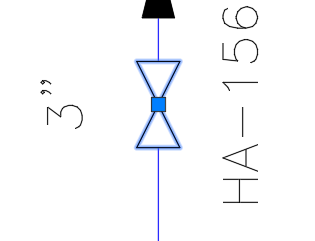
Engineering Item (Valve)
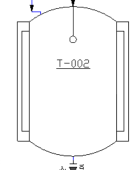
Engineering Item (Tank)


The classification is done based on the Class Properties and Block properties of each Block Reference in the chosen Environment as we will describe further on.
To edit these click “Class Properties” and then select one class at a time either in the window or in AutoCAD:
Select the single Block Reference belonging to the class you want to update:
Click Class Properties

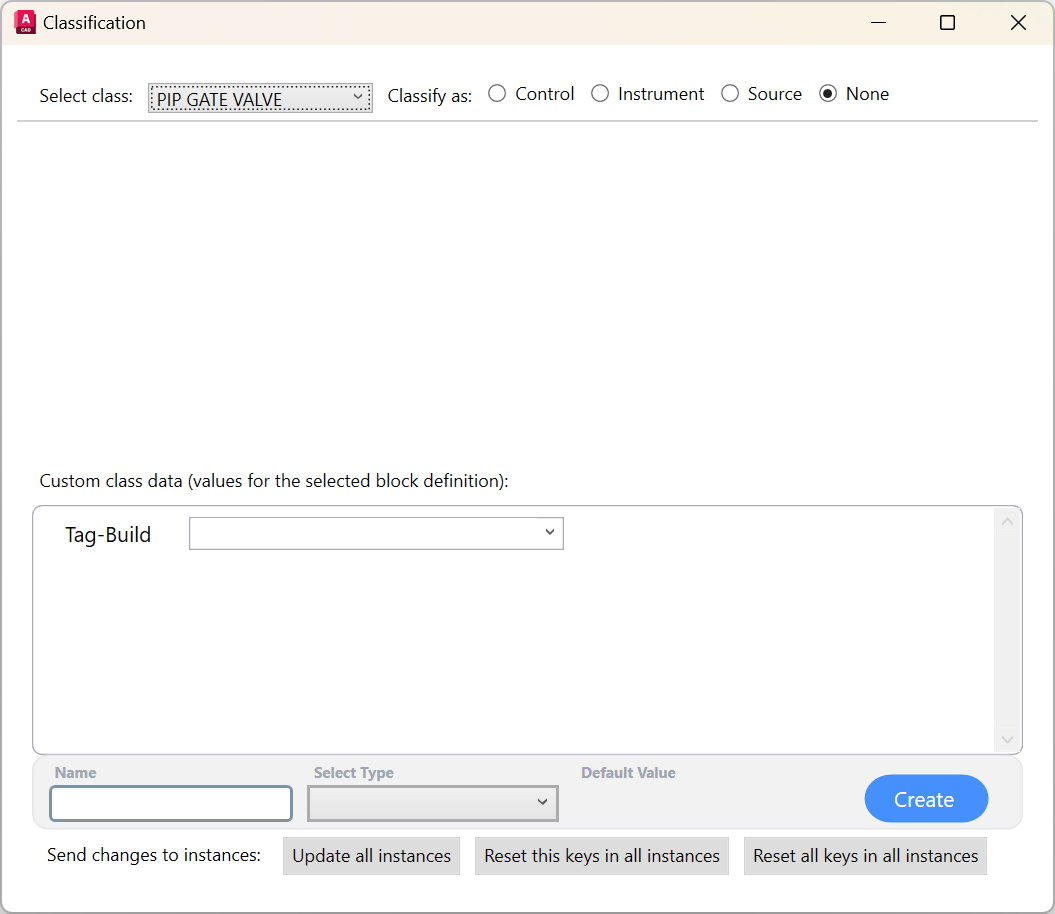
On the Classification Window you can see That the “PIP GATE VALVE” class or group definition is now being edited. To change to another class, either select a different class or group from the combo box, or in AutoCAD select another single block reference.
To easier create the Tokens, use the Token Builder window: